Photography for e-commerce tips
When creating an online store, one of the first things you should consider is photography for e-commerce.
Images not only attest to the quality of your product, but also serve as windows into your e-commerce business, creating two very important things: transparency and trust.
Photography for e-commerce: how to produce high-quality images
The focus of photography for e-commerce is to work with images of the products that will be sold, creating an attractive and persuasive virtual storefront.
One research on consumer psychology revealed that 93% of consumers consider images a determining factor in their purchasing decision.
The quality of your photos directly reflects on your brand image, creating the first impression a customer has of your store.
To make the most of this first impression, it’s important to present professional and refined images, capable of engaging the visitor.
New entrepreneurs often can’t afford to invest in professional photography for e-commerce and have to do it themselves. But know that this is not impossible at all.
The key is to find a process that meets your needs, optimize it, and create a set of guidelines to ensure that you keep your images consistent.
To help, we’ve prepared some e-commerce photography tips that you can apply without investing much.
– How to create an online store
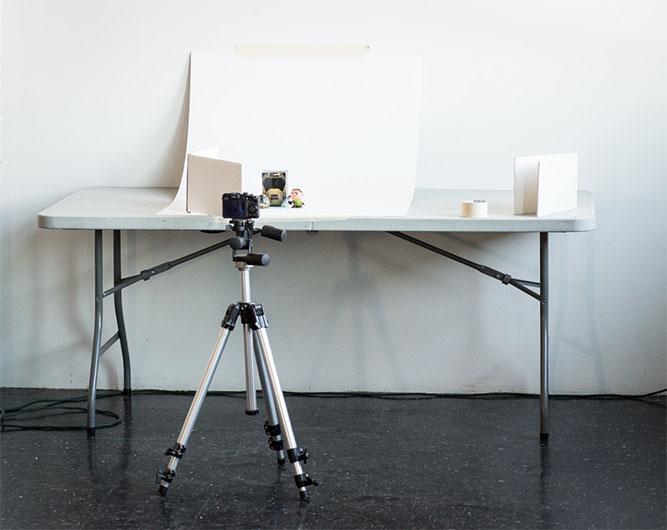
1. Neutral background
Getting the perfect background is worth the effort because it simplifies the entire editing process.
Use a white or light-colored background. This makes it easy to remove when retouching your images.
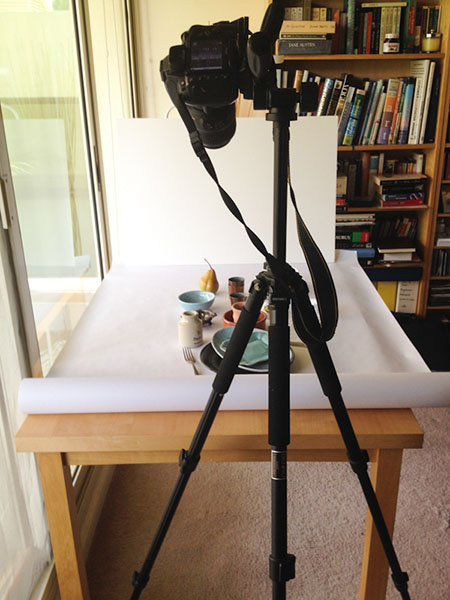
There are many ways to improvise a background. You can set up your own photography table or light tent, for example.
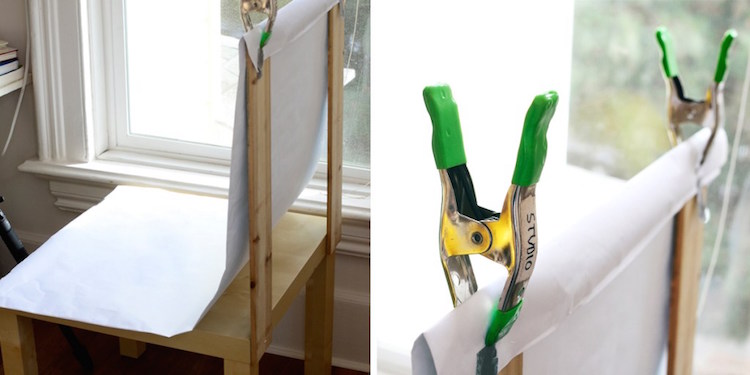
To create a photography table, all you need is a chair and a roll of office paper.
The simplest way to achieve this is to push the chair against a wall and stick craft paper to its surface, allowing it to fall naturally to the floor, creating a smooth transition between the vertical and horizontal planes.
Or you can attach the paper to the top of the chair to improvise a support, as in the image below.
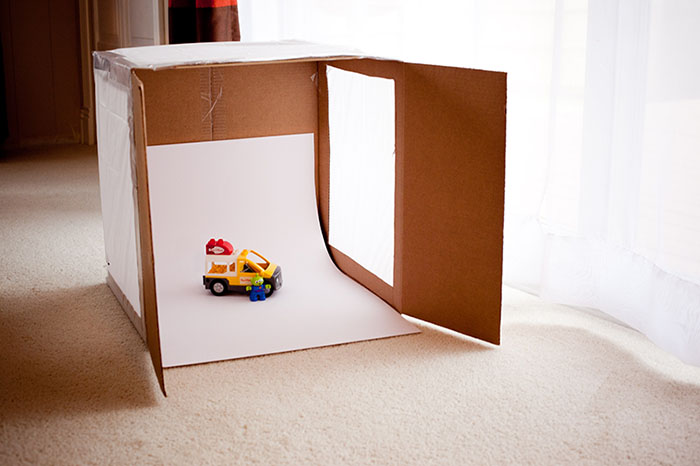
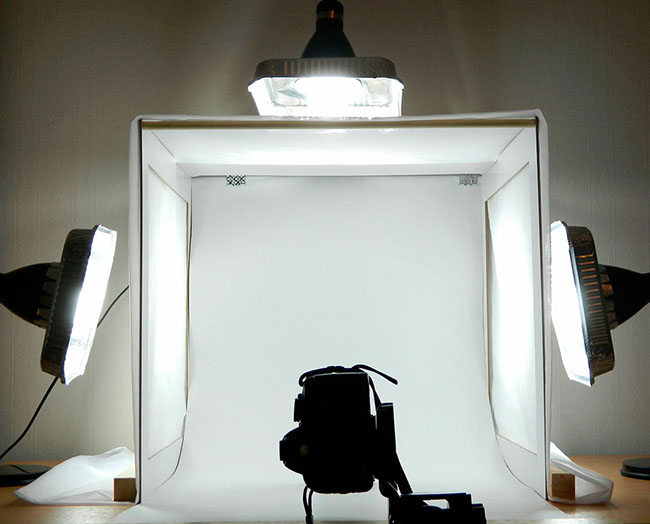
Another option is to create your own lightbox, also known as a light tent.
A light tent is a box-shaped device with translucent walls, designed to help distribute light evenly around the subject.
There are several ways to make a lightbox. All you need is a kind of box placed on its side, with the opening facing forward.
You can build the structure of this container using cardboard, wood, pipes, or whatever you find most suitable.
Next, glue white paper to the bottom and sides to act as diffusers, helping to distribute the light better and minimizing shadows.
Depending on your budget, you can use artificial lighting (light fixtures) and place them on both sides of the box, or simply take advantage of natural lighting by placing your lightbox next to a large window.
2. Lighting
If there’s one factor that defines the quality of your e-commerce photography, it’s the light.
Setting up the right lighting can be time-consuming, but it yields wonderful results and significantly simplifies the editing process.
You have two options:
⦁ Natural light (sunlight): Ideal for a photography table.
⦁ Artificial light (studio light): Ideal for lightboxes.
Natural light
Start by placing your photography table near a large window. Preferably one that lets plenty of light into the room.
If the light is too harsh (the kind where you can clearly distinguish the outline from the shadow), you can diffuse it by placing a white cloth or paper over the window.
If the shadows are too harsh, place cardboard on both sides of the object; this helps to reflect and soften the light.
Ideally, you should take photos on a very sunny day, because it’s better to have plenty of light and minimize it than to have not enough light.
It’s very difficult to create great lighting during the editing process.
Artificial light
If you are going to use artificial lighting, you’ll need at least two lighting settings to get the shadows right.
One of the lights should serve as your main light and the other as a fill light or backlight, depending on the desired results.
Consider placing some white paper or cloth over the light fixtures to create softer shadows.
Your main light should be placed in front of—often slightly to the side of—the product, while your fill or backlight is on the opposite side, behind or above.
Adjust the angles and distance of the lights until you obtain soft, evenly distributed shadows.
You can also use white drywall or cardboard to neutralize some of the light and soften those shadows even more.
This is what lightboxes are designed to do; they are diffusers, distributing light evenly around the product.
Once you have the correct setup, you can achieve consistent, professional results and replicate them for all your e-commerce photography sessions.
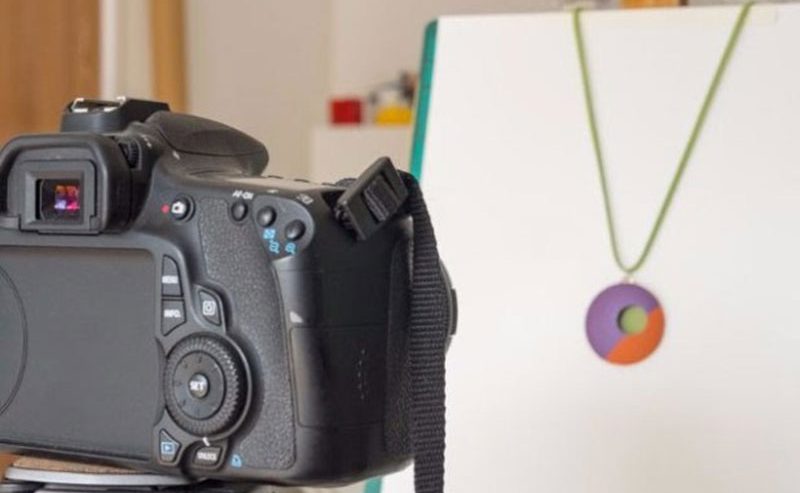
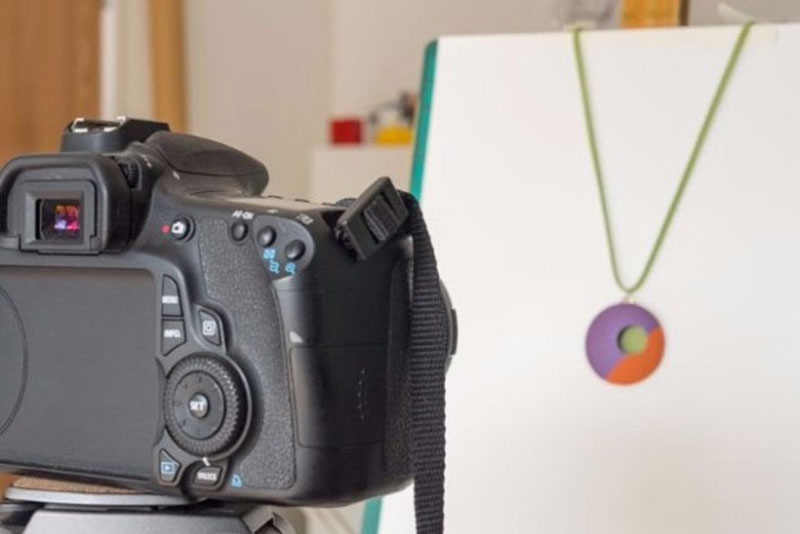
3. Tripod
Tripods provide consistency, stability, and focus.
It’s easy to end up with blurry images when you try to focus on the product while holding the camera in your hand and trying not to shake.
If you can’t fit a tripod into your budget, use a stack of books or a stool to keep your camera steady.
However, a decent tripod will last for many years, and it’s a low-cost piece of equipment, meaning it’s worth buying one.
If you are using a camera, adjust it to a small aperture and slow shutter speed.
This way, you’ll have a great depth of field, keeping your entire product in focus and ensuring its sharpness.
Stabilizing the camera is vital when shooting with a large depth of field to avoid blurry images.
4. Camera
In e-commerce photography, having a good camera is essential.
If you have one DSLR camera (professional) here are some usage recommendations for product photography:
- Do not use a wide-angle lens, you will distort the image of the product;
- A wide aperture, such as f/2.8 or f/4.5, will narrow your depth of field, leaving parts of your product out of focus. A small aperture, such as f/8 or f/11, will give you a greater depth of field, keeping all of your product sharp and in focus.
- Use the correct white balance. When photographing, you should adjust it to the same temperature as your lighting.
However, if you have a good smartphone, you won’t need to worry about investing in a camera when you’re starting out.
Smartphone camera technology has come a long way, and sometimes you can take even better photos than using a professional camera.
Therefore, as long as you have the right lighting and background, your iPhone or Android can do a good job.
Using a smartphone stabilizer or tripod helps reduce shaking and speeds up the editing process.
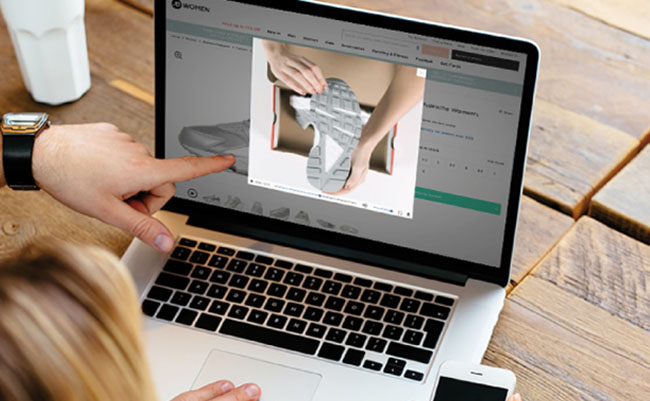
5. Edition
Retouching your images after the photoshoot is vital to achieving a flawless look.
Even if you take your photos with a smartphone or a DSLR, editing can be the difference between mediocre and professional results.
For those just starting out, getting the background or lighting right requires a bit of trial and error.
Happily, photo editing can magically make a multitude of flaws disappear.
During editing you can correct anything, such as removing the background for color correction, removing the mannequin, adding shadows for a more natural look, etc.
On the internet, it is possible to find some free editing software that facilitate this work, such as:
- Pixlr – has several Photoshop functionalities;
- Canva – easy to use and ideal for marketing materials;
- Fotor – an editing app for smartphones;
- Snapseed – a powerful mobile application with many features.
For those who have never worked with this before, the process can be time-consuming at first, until you get the hang of things.
However, nowadays with AI tools things have become much easier.
A simple request to ChatGPT can transform your photos.
– 7 powerful AI tools for e-commerce
Invest in photography for e-commerce and sell more
The world of e-commerce is showing no signs of slowing down and photos provide consumers with a virtual window into your business.
There is no doubt that visual content plays an important role in online purchasing decisions.
In addition to excellent e-commerce photography, make sure to offer your visitors a well-designed and functional online store, ensuring the best possible online shopping experience.
Another key factor for a successful e-commerce business is its shipping policy.
Offering a variety of delivery options, an online shipping quote tool, and a tracking code makes all the difference when it comes to making a purchase.
– How to calculate shipping costs in e-commerce
With focus on providing a fast and secure delivery service, Delivery365 it’s an e-commerce app that connects your business to a database of hundreds of registered delivery drivers.
Specializing in fast delivery for e-commerce, the Delivery365 app has everything you need to easily create your online store and start selling products and services right away.
– How to create a service delivery business
Visit our website, discover our services and offer your customers the best online shopping experience.